To give you an idea of how I paint, I decided to take a photo after each layer of the “Petals in Gray Sky” so you kinda get a feeling for how a painting is made. These aren’t the best photos, but they at least give you an idea. 🙂
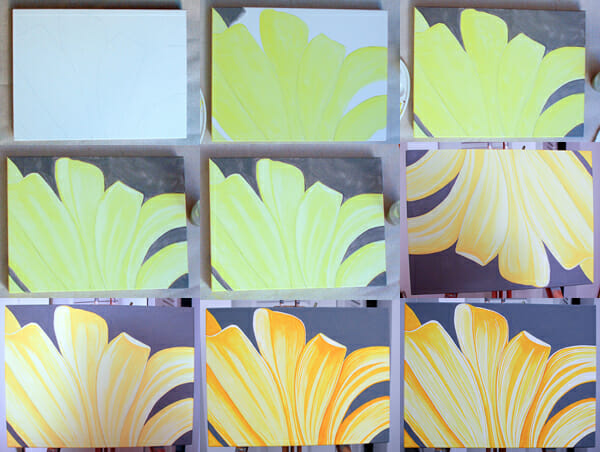
To start, I sketched the outline of the painting, just so I would know the perspective was right and the shape of what I was painting looked semi-alright. Then I added the base color of the petals. I don’t really enjoy the first few layers… I do love, howevever (and often spend too much time) spending time on the details which comes much later.
I filled in the first layer of the background color fairly early this time, normally I wait to make sure the shape is right so I can change things around. Next comes a little highlighting where I added some diluted whites here and there to give it some dimension and then I started working on adding the details – first the darker yellow and then white details…and finally some light-yellow. In between those layers were a few background layers (3 or 4). And yes, sometimes I paint a layer upside down while a side is drying (the easel will otherwise leave marks on the canvas).
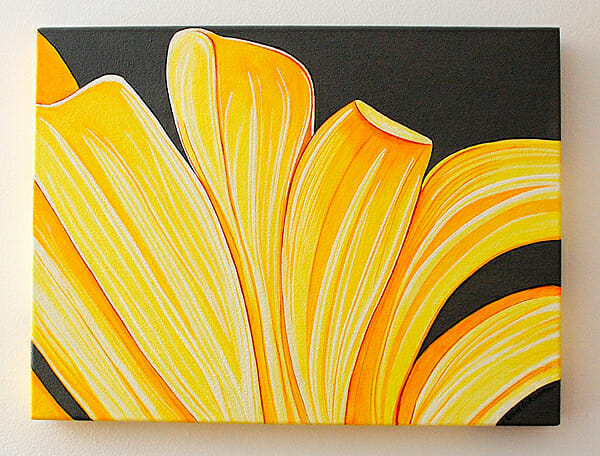
Once I knew the painting was close to being done, I added a dark-gray outline around the petals and a darker tan-ish color to highlight the edges of the petals where they are touching. Ta-daa!
And here’s the finished painting with the final layer, plus the varnish!
Hope you enjoyed this little ‘behind the scenes’ tour!
e.