MY TOP SECRET LIST OF ACRYLIC ART SUPPLIES
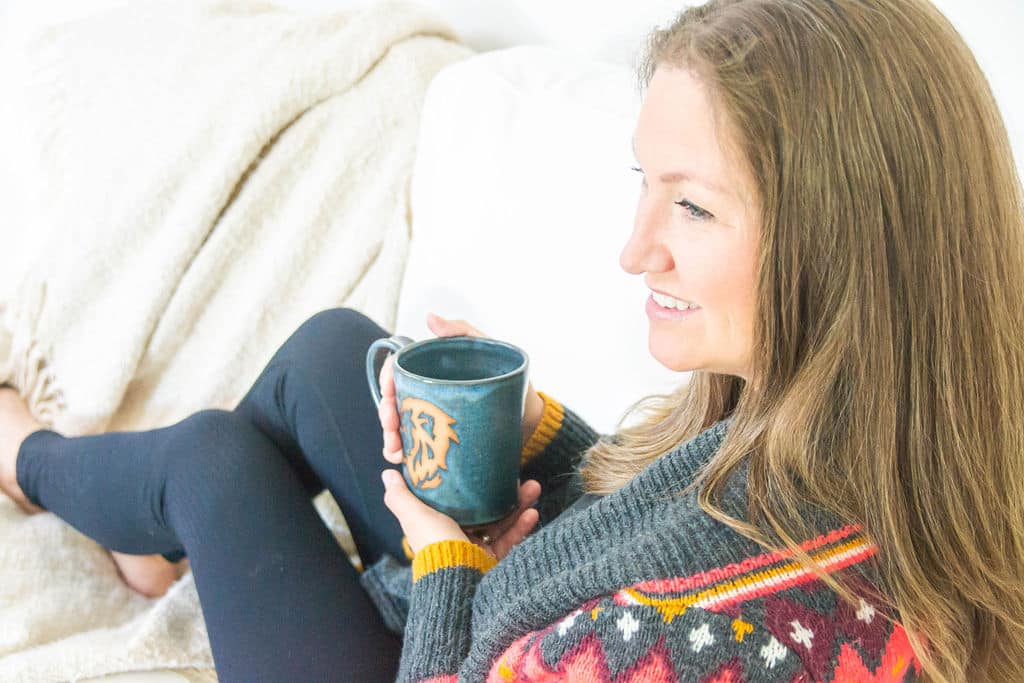
Created by Erica Eriksdotter, third-generation painter, 40+ years painting experience

Have you ever stood in front of a wall of art supplies. Rows of colors, brushes, canvases you’ve never touched. And felt that familiar tightening in your chest.
Where do I even begin. What if I choose wrong. What if I’m not ready.
I know that feeling.
When I was a young girl in a small town in Sweden, we had one art store. One. And no internet.
The men behind the counter seemed to know everything, and I felt silly not knowing what to ask. So I kept my questions tucked tightly inside. I traced my fingers across the rows of brushes, and I picked up sponges and masking fluid simply because I needed something to bring home. Something that let me believe I was an artist.
“I believed everyone else already knew what they were doing, except me.”
Fast forward many years.
My paintings have been featured in global media and collected around the world, and I now help others create art they’re proud to display, sell, and gift. But it didn’t begin that way. It began with that little girl who didn’t know what to ask, and who thought she was the only one who felt unsure.
Maybe you’re here because you’re just beginning.
Maybe you’ve painted for years but want to feel more confident.
Maybe you’re dreaming of selling your pet portraits one day, or you’re already building an art business and want the tools professionals use.
Maybe you’re here to honor a pet you’ve loved, because art feels like the only way to hold them close.
This guide is for all of it.
It’s a list, and it’s a guide.
It’s both the doorway in and the deeper look behind the curtain.
It’s where I show you what I actually use as a professional pet portrait painter, so you can use it too.
I made this list and guide so you don’t have to feel lost or intimidated the way I once did.
So you can pick up a brush feeling supported, confident, and held.
You don’t need everything. You only need the right things.
With the right tools, painting becomes more enjoyable. It becomes possible to finish the painting you imagine.
It supports your longevity as an artist. It allows you to return to the easel again and again.
This isn’t only about doing a project.
This is about becoming someone who paints.
Now let’s talk about what you actually need to begin, so painting feels possible and enjoyable, not overwhelming.
Have you ever stood in front of a wall of art supplies, rows of colors and brushes you’ve never touched, and felt that familiar tightening in your chest.
Where do I even begin. What if I choose wrong. What if I’m not ready.
I know that feeling.
I grew up in a small town in Sweden. We had one art store. One. And no internet.
I felt silly not knowing what to ask, so I stayed quiet. I picked up sponges and masking fluid just to have something to bring home. Something that let me believe I was an artist.
“I believed everyone else already knew what they were doing, except me.”
Fast forward many years.
My paintings are now collected around the world and featured in global media, and I teach others how to paint art they’re proud to display, sell, and gift.
Maybe you’re just beginning.
Maybe you want to feel more confident.
Maybe you’re dreaming of selling your pet portraits, or you’re already building an art business.
Maybe you’re here to honor a pet you miss.
This guide is for all of it.
It’s where I show you what I actually use as a professional pet portrait painter, so you can use it too.
You don’t need everything. You only need the right things.
With the right tools, painting becomes more enjoyable. It becomes possible to finish the painting you imagine.
It lets you return to the easel again and again.
This is about becoming someone who paints.
Now let’s talk about what you actually need to begin, so painting feels possible and enjoyable, not overwhelming.
The Quick-Start Acrylic Set (start here)
A simple set of supplies to get you painting right away.
I’ve curated a small group of tools that give you everything you need to complete your first painting (or pet portrait). You don’t need more than this to start.
You need:
1️⃣ Liquitex Basics Acrylics: Set of 8 (for color mixing)
2️⃣ A brush set: Princeton Select Set of 7
3️⃣ Canvas pad: Strathmore Acrylic Pad 9×12
4️⃣ A towel + mason jar + pencil
Not sure what to paint first? Start with the eyes. They’re the heart of every portrait, and once you can paint them, everything else becomes possible. Begin with soulful eyes

FULL ACRYLIC SUPPLY LIST
Scroll and tap where you want to go.
Best acrylic paints

Paints: Why I Choose Liquitex
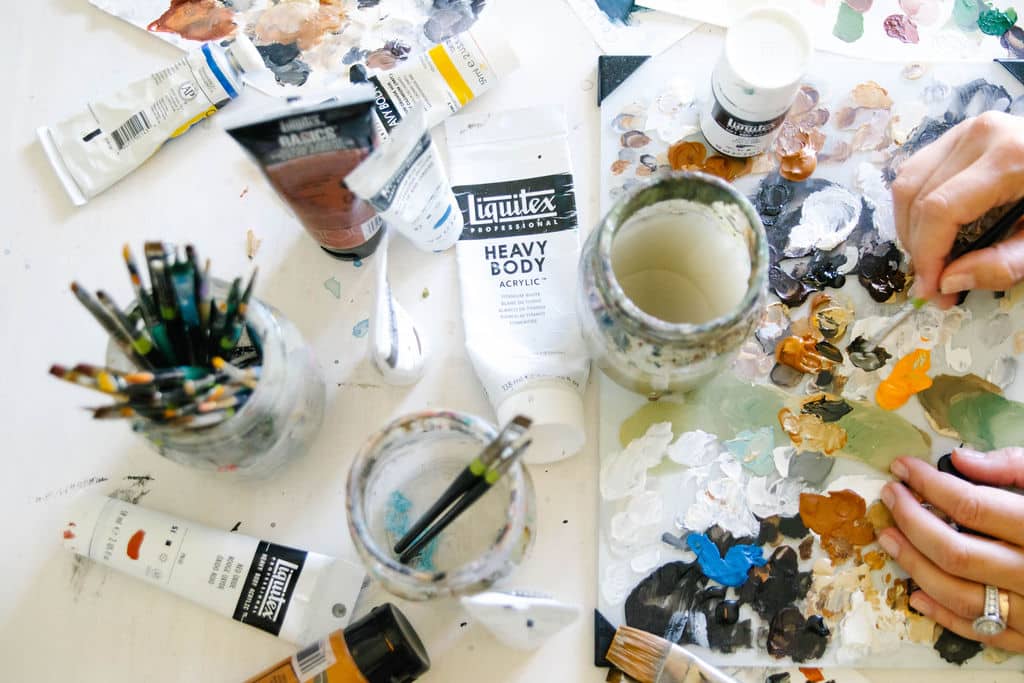
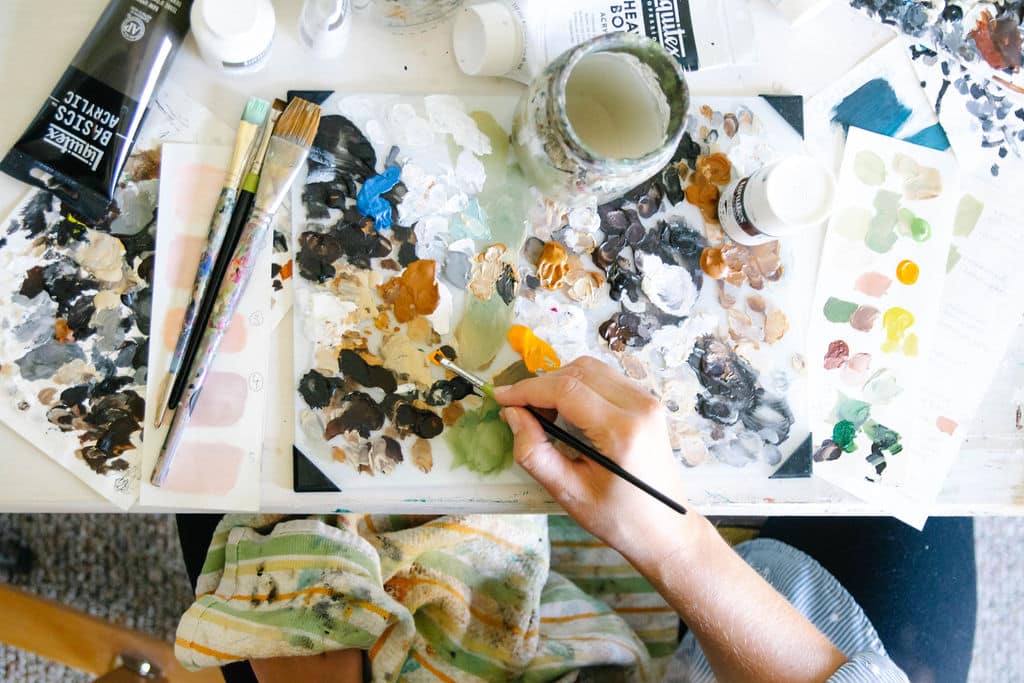
There are many acrylic paint brands, but Liquitex is the one I return to every time. I love the performance, consistency, and how easily I can open and close the tubes, which matters when you paint for hours.
I began my career using Liquitex Basics, the student-grade line. They’re affordable, high-quality, and blend beautifully. I still use them today, alongside the Heavy Body and Soft Body professional ranges. Basics has a buttery texture that’s perfect for building thin, layered strokes, which is how I paint.
Because many of my portraits are commissioned in memory of beloved pets, I use paints that last. Liquitex pigments are lightfast, meaning they won’t fade for 50 to 100 or more years. With varnish, your painting will stand the test of time.
Basics come in different tub sizes but I recommend the 4 oz tube for portrait work. If you’re taking How to Paint Soulful Eyes, these Basics colors are everything you need to begin. If you’re on a budget, simply buy the colors you need for your first subject. One painting at a time is enough.
The core palette I reach for every day for my pet portraits:


Optional upgrade: Titanium White in Heavy Body for extra coverage.
If you’d love support putting these supplies to use, or you want to begin with just one powerful skill, I’d love to teach you how to paint soulful eyes you’re proud of. Explore How to Paint Soulful Eyes now.
Best acrylic brushes
The brush you use matters. Not for perfection, but for how it feels in your hand. When a brush performs well, painting becomes joyful. When it drags, sheds, or streaks, it can make you believe you’re doing something wrong, when really it’s the tool that isn’t supporting you.
A good brush should feel comfortable to hold, glide when you blend, and carry enough paint so you’re not constantly reloading. You’ll know right away when a brush stops performing. I do. I just set it down and reach for another.
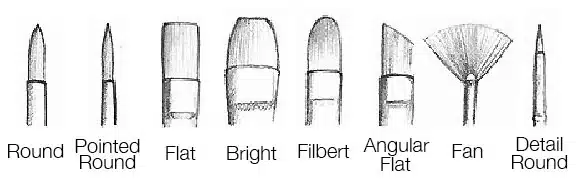
Brush Shapes
Brushes come in many shapes: round, pointed round, detail round, chisel blender, flat, angular flat, and fan. Different shapes support different strokes. Choose based on the size of your painting and how you want the fur, features, or background to look.
Brush Fibers
Brush fibers were once all natural animal hair. Synthetic brushes today are just as good, often better, and more affordable. I exclusively use synthetic brushes because they’re cruelty free and work beautifully with acrylics.
Bristle softness matters too:
- Soft brushes hold more paint and are great with fluid paints
- Medium brushes offer a balance that supports layered blending
- Firm brushes pair well with thicker acrylics
I prefer soft brushes that still have a little resistance. That gentle tension helps me create thin, controlled layers.
Brush Handles
Long handles are typically used for standing at an easel. I paint close to my canvas in thin layers, so I exclusively use short handled brushes. They give me more accuracy, more steadiness, and more connection to the painting.
What to Buy First
If you’re beginning or experimenting, start with a small set so you can explore different shapes and see what feels natural in your hand. Then buy more of whatever becomes your go-to.
Recommended beginner friendly sets:


My Favorite Brushes as a Professional Pet Portrait Painter
My signature brush is the chisel blender. It’s flat, square ended, and made with medium fibers. It holds enough paint, blends softly, and lets me create delicate fur and eye details with control.
Sizes I reach for daily: 2, 4, 6, 8 (in Blick Masterstroke Golden Taklon Brushes or Princeton Select Series 3750)
You’ll also want:
- A wide flat or wash brush for groundwork and background layers (Princeton Select Synthetic Brush – Flat Wash, Short Handle, Size 1 inch)
- A script liner or small round brush for signing (Princeton Select Synthetic Brush – Script Liner, Short Handle, Size 10/0 or Round, Short Handle, Size 0)
Best acrylic paint canvas
There are different styles of canvases to suit different mediums (acrylic, watercolors etc.): stretched canvas, canvas panels, canvas paper and canvas rolls. Let’s walk through them together.
One of the first paintings I did using an easel was on an acrylic on a canvas panel. I was ten and wasn’t sure what ‘feeling’ I was looking for to enjoy the process. It’s more stable than a stretched canvas and a good option when painting outdoors or using a box easel.
Then I moved on to canvas paper which is a wonderful material for planning out a painting, practicing techniques and for playing. I used it for many years and sold several paintings using this style. It’s a must-have for beginners, and I recommend getting a canvas paper that replicates the surface of a canvas.
Canvas rolls are great for advanced painters who want to cut their own custom size, or paint a larger size of art. This is the way to go if you plan on shipping a large painting across the world as you just roll it up when you’re finished and ship it in a tube.

My personal favorite is a stretched canvas. While not as budget friendly as canvas paper pad, these are ready to hang and will create an instant impression for the viewer. You can buy them in bulk at discount for studies and experiments or practice on canvas paper and then switch to a stretched canvas when you’re ready.
Stretched canvases come in different profiles (depth of the canvas) from under an inch to over two inches deep. The traditional profile (the 3/4” deep canvas) is a perfect first stretched canvas to use as a beginner, and the 1.5 inch deep canvas, which is my favorite profile, makes an instant professional impression and looks great when displayed unframed.
Then you have the different fabric canvases are made up of: cotton and linen, with cotton being a great affordable and durable option for beginners and the most popular surface for acrylic painting.
When it comes to the size of the canvas, it’s up to you and the painting you’re planning. Start with 8” x 10” or 12” x 12” and focus on following through with the painting.
Here are my favorite budget friendly, pre-primed cotton and acid-free canvases and pads for beginners I recommend having on hand:
- Canson XL Oil and Acrylic Pads (the 24 sheets are perfect for the 21-Day Painting Challenge!) Or the Strathmore 400 Series Canvas Paper Pad
- Stretched Cotton Traditional Profile Canvas, any size
- Stretched Cotton Gallery Profile Canvas, any size
Best acrylic painting tools + accessories
Palette: You’ll need a palette where you can mix and blend your paint colors on. Over the decades I’ve used a variety of tools, and it’s important to choose a palette that works for you.
When you’re picking a palette, ask yourself if you want it rested on a worktable next to you, or do you want to hold it in your hand while you paint? What about attaching it to the easel, or keeping it in your lap? If you use specific blends or sit in shorter sessions, you may want to consider a palette that makes the paint stay wet for longer. How about a peel-off palette for easy cleaning or a glass table top?
There are different shapes to consider too. Do you like rectangular ones or an oval shape with an easy-grip thumb hole? Do you prefer a flat service or a palette tray designated with small wells (or cups) for holding paints and mixing colors.
Here are my favorite palettes I’ve used during various times over the last three decades and recommend to my students:
- Mijello Fredi Weber Peel-off Palette
- Richeson Palettes with comfortable grip
- Masterson Sta-Wet Handy Palette (great for low humidity areas!)
- Blick Palette Paper Pad, size 9×12
If you live in an area with low humidity, I recommend using the sta-wet palette and this mister on hand to either keep your acrylics wet or mist the back of the canvas.
Palette Knife: A tool that can be used as a replacement for a brush for added texture is a palette knife. It’s also used for blending colors together. I had no idea what it was used for when it came in a beginner acrylic set many years ago. The flexible blade on a long, balanced wooden handle can create patches, lines, edges and texture for an interesting look on a canvas. They come in different shapes and I recommend the more common tapered knife to start.
Jar for holding water: When you’re painting with acrylic paints you want to clean your brush regularly and especially when switching between colors, in water. I have several Mason jars on hand in the studio for my water and to store my brushes in.
I like glass because I can quickly see when the water gets dirty and it’s time to switch it out. Consider a jar that is stable and can handle swooshing your brush around in the jar without tipping over. Other than that, any jar will do as it adds to your enjoyment.
Cleaning supplies + aprons: Let’s start with brush cleaners because it’s important to keep our brushes clean and protected. I rinse my brushes frequently during my painting process, and clean them after each session and stand them upright in an empty Mason glass jar to dry.
I’ve used the non-toxic cleaner, Branch Basics, in my studio for a decade and often simply reach for their natural hand-soap when cleaning my brushes. It works well to remove any leftover acrylic paint. For years I used Pink Soap to clean my acrylic and watercolor brushes and it works well. I still have it and use it when I need some extra help. It contains a conditional and is gentle on our environment.
- Pink Soap Artist Brush Cleaner, 8 oz
- Branch Basics (my go to non-toxic cleaner for literally everything in my home)
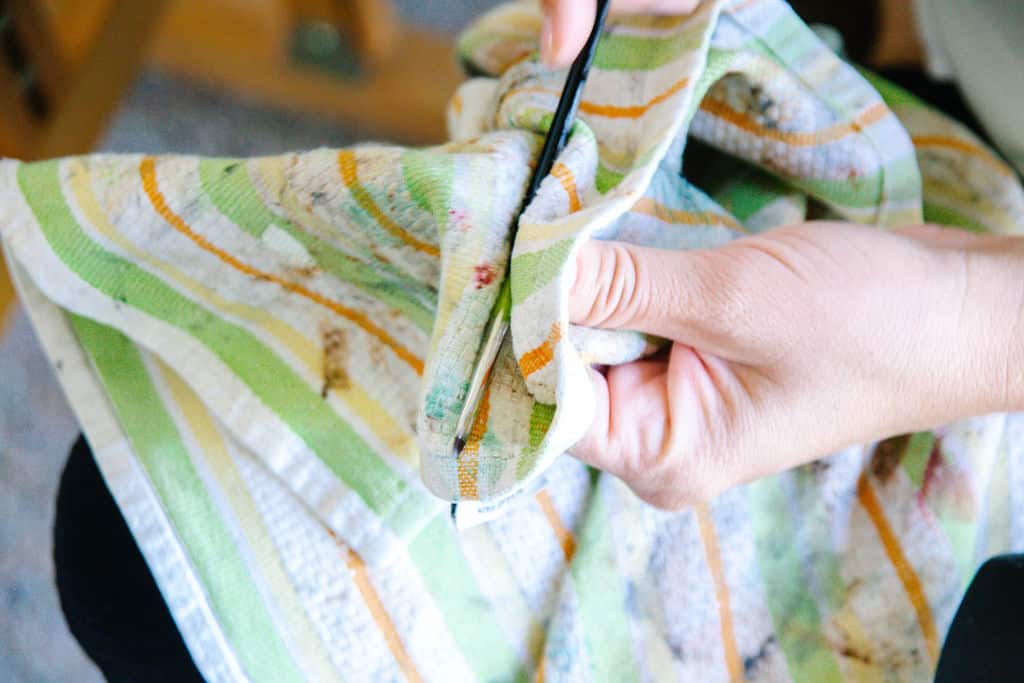
Towel: You’ll need a towel or rag when you paint. It’s essential to wipe your brush off between paints and after cleaning your brush in the water.
- Cavallini Tea Towels
- William-Sonoma Striped Towels
You want a towel or rag that’s absorbent and preferably 100% cotton that leaves no fuss on your brush. I’ve used the classic striped towels from William-Sonoma for over a decade. Use what you have on hand and ready to toss once you’ve gotten acrylic paint on it.
Apron: It’s important to project our clothes when we paint as acrylic paint won’t come off in the washer. I have several on hand but I’m so deliberate with my brushwork that I find that my towel is enough. Still, an apron is always a great idea and here’s what I use with my students.
Artist Tape: In the beginning, I used tape on my canvas paper to create a clean 2 inch border for easy framing. You can also use it to protect certain parts of a painting or if you want to create clean lines.
Best sketching tools
Every pet portrait starts with a sketch directly on the canvas for me.
First I use a ruler and a pencil to create a grid, and then I sketch the portrait which creates the foundation of the painting. I use a pencil sharpener throughout to make sure the lines are always neat.
Ruler: While I use two different ruler sizes today when I paint, a larger ruler will draw a straight line across the more common canvas sizes for grids.
Pencils: How the pencil feels against the pre-primed canvas is important to me – it needs to glide smoothly and have a harder degree of sharpness to create crisp and lighter gray lines to avoid smudging once I apply the paint. I use pencils made specifically for drawing and sketching and mostly use HB or 2H.
- Staedtler Lumograph Drawing and Sketching Pencils
- Staedtler Yellow Pencils, HB #2
- Faber-Castell Goldfaber Sketching Pencil, H
Pencil Sharpener: Any good pencil sharpener will be OK but it is helpful to have a high-quality sharpener that will last you a while. I love my little red glass one.
Eraser: If you sketch on canvas you’re going to need a good eraser that doesn’t smudge the graphite or leaves a trail of dust that you can’t get rid of.
Best supplies for your Painting Workspace
Easel: You want to create an enjoyable environment when you paint and only you will know what that is. For me, it’s surrounding myself with items that mean something to me, like a painting by my grandfather (I’m the 3rd generation painter), a special quote that gives me the extra kick-in the butt when I need it, and my first watercolor painting set I bought in Sweden.
You also want to create a workspace that supports you, yes, even as a beginner. An easel is a great way to keep your canvas sturdy and your physical body supported during long hours.
There are all kinds of easels and here’s what I recommend starting out with:
Daylight lamp: If you find yourself painting in the evenings after work, consider investing in a daylight lamp which mimics natural light. I have mine on everytime I paint because the bright, clear light helps me see contrast and colors better yet sheds low heat so stay comfortable.
If color matching is important to you, like it is for me when painting custom pet portraits (even a tiny bit off in the hue and a commission can be ruined!) a color calibrated LED light (or even just the bulb) will assist you.
It’s challenging to go budget-friendly when buying a daylight artist lamp, it’s an investment for use but well worth it! Start with an adjustable lamp that you have already and simply replace the bulb.
Arm Support: Many painters use a mahl stick as a welcomed armrest. It’s a simple wooden stick that you lay across your table or easel at an angle, or rest it on a dry spot on the canvas to support your arm in general or when painting details. If you plan on sitting or standing a lot when you paint, this will avoid shoulder and arm pain.
Caring for your painting
I know I’m sharing acrylic painting supplies for beginners, but what happens after you’ve finished? How do you prepare it for hanging and preserve it for generations to come?
Varnish: It can be a little scary to varnish a painting for the first time, particularly one that you’re proud of or your first commission. But it’s important. Varnishing will protect your painting from chemicals, water, abrasion and UV light and it can be used to provide lasting protection for your artwork.
There are a variety of finishes, including gloss, matte, high gloss and satin. I went glossy in the beginning but prefer the non-glare look to fully appreciate the details of the pet.
Varnish may be toxic or hazardous. Be sure to apply in a ventilated area and use plastic gloves.
- Liquitex Acrylic Varnishes (to be applied with brush)
- Liquitex Soluvar Varnish Spray
If you’re planning on varnishing your paintings with a brush, consider investing in a large gesso brush that holds a lot of varnish. Just make sure you clean it well after every use, otherwise it’s a one-time-use. Trust me on this one.
Getting it ready for the wall: Your painting is finished and varnished, now it’s time to prepare it for hanging. You’re going to need a wire, wire cutter, hangers for the back of the canvas to hold the wire, and nails for the wall.
- OOK Framer’s Pro Wire – 30 lb
- OOK D-Ring Hanger pack with screws (15 lb weight capacity)
- OOK ReadyNail Conventional Picture Hangers (10 lb weight capacity)
Below are some handy hand tools to get the job done.
- Fiskars Precision Wire Cutter
- Fiskars Precision Screwdriver
- Fiskars Precision Hammer
- Fiskars DIY Precision Level
Find inspiration in the world around you
When we pour our hearts into our art, it’s important to fill our cups from things that inspire, motivate, and yes, remind us to be lifelong learners.
For me, those things are anything gardening related, genealogy research, a beautifully made period piece drama or deep diving into books with uplifting and strong female friendships.
I also love serving others through teaching and giving back to the community. Studio Eriksdotter is a socially conscious company and I’m passionate and motivated about supporting women, children and animals in need.
- Check out my blog post audiobooks to paint to for great books like Big Magic by Elizabeth Gilbert to listen to while you create.
- Baumgartner Restoration YouTube channel
- Learn with Erica painting courses
- Together Rising
- Floret Flower Farm
There you have it.
My favorite starting kit if you’re looking for acrylic painting supplies for beginners with lots of bonus supplies to support both you and your beautiful paintings.
Remember, simply start. See creativity as an action rather than wait for that ‘creative feeling’ to happen before picking up a paint brush.
Your art is needed my friend.
Xo,
P.S. If you’re ready to level up as a painter, click here to learn about my courses and resources.