DAY 1: SOULFUL EYES
Note: If you haven’t sketched Charlie out on your canvas yet, please visit Preparing for Success and follow the steps.
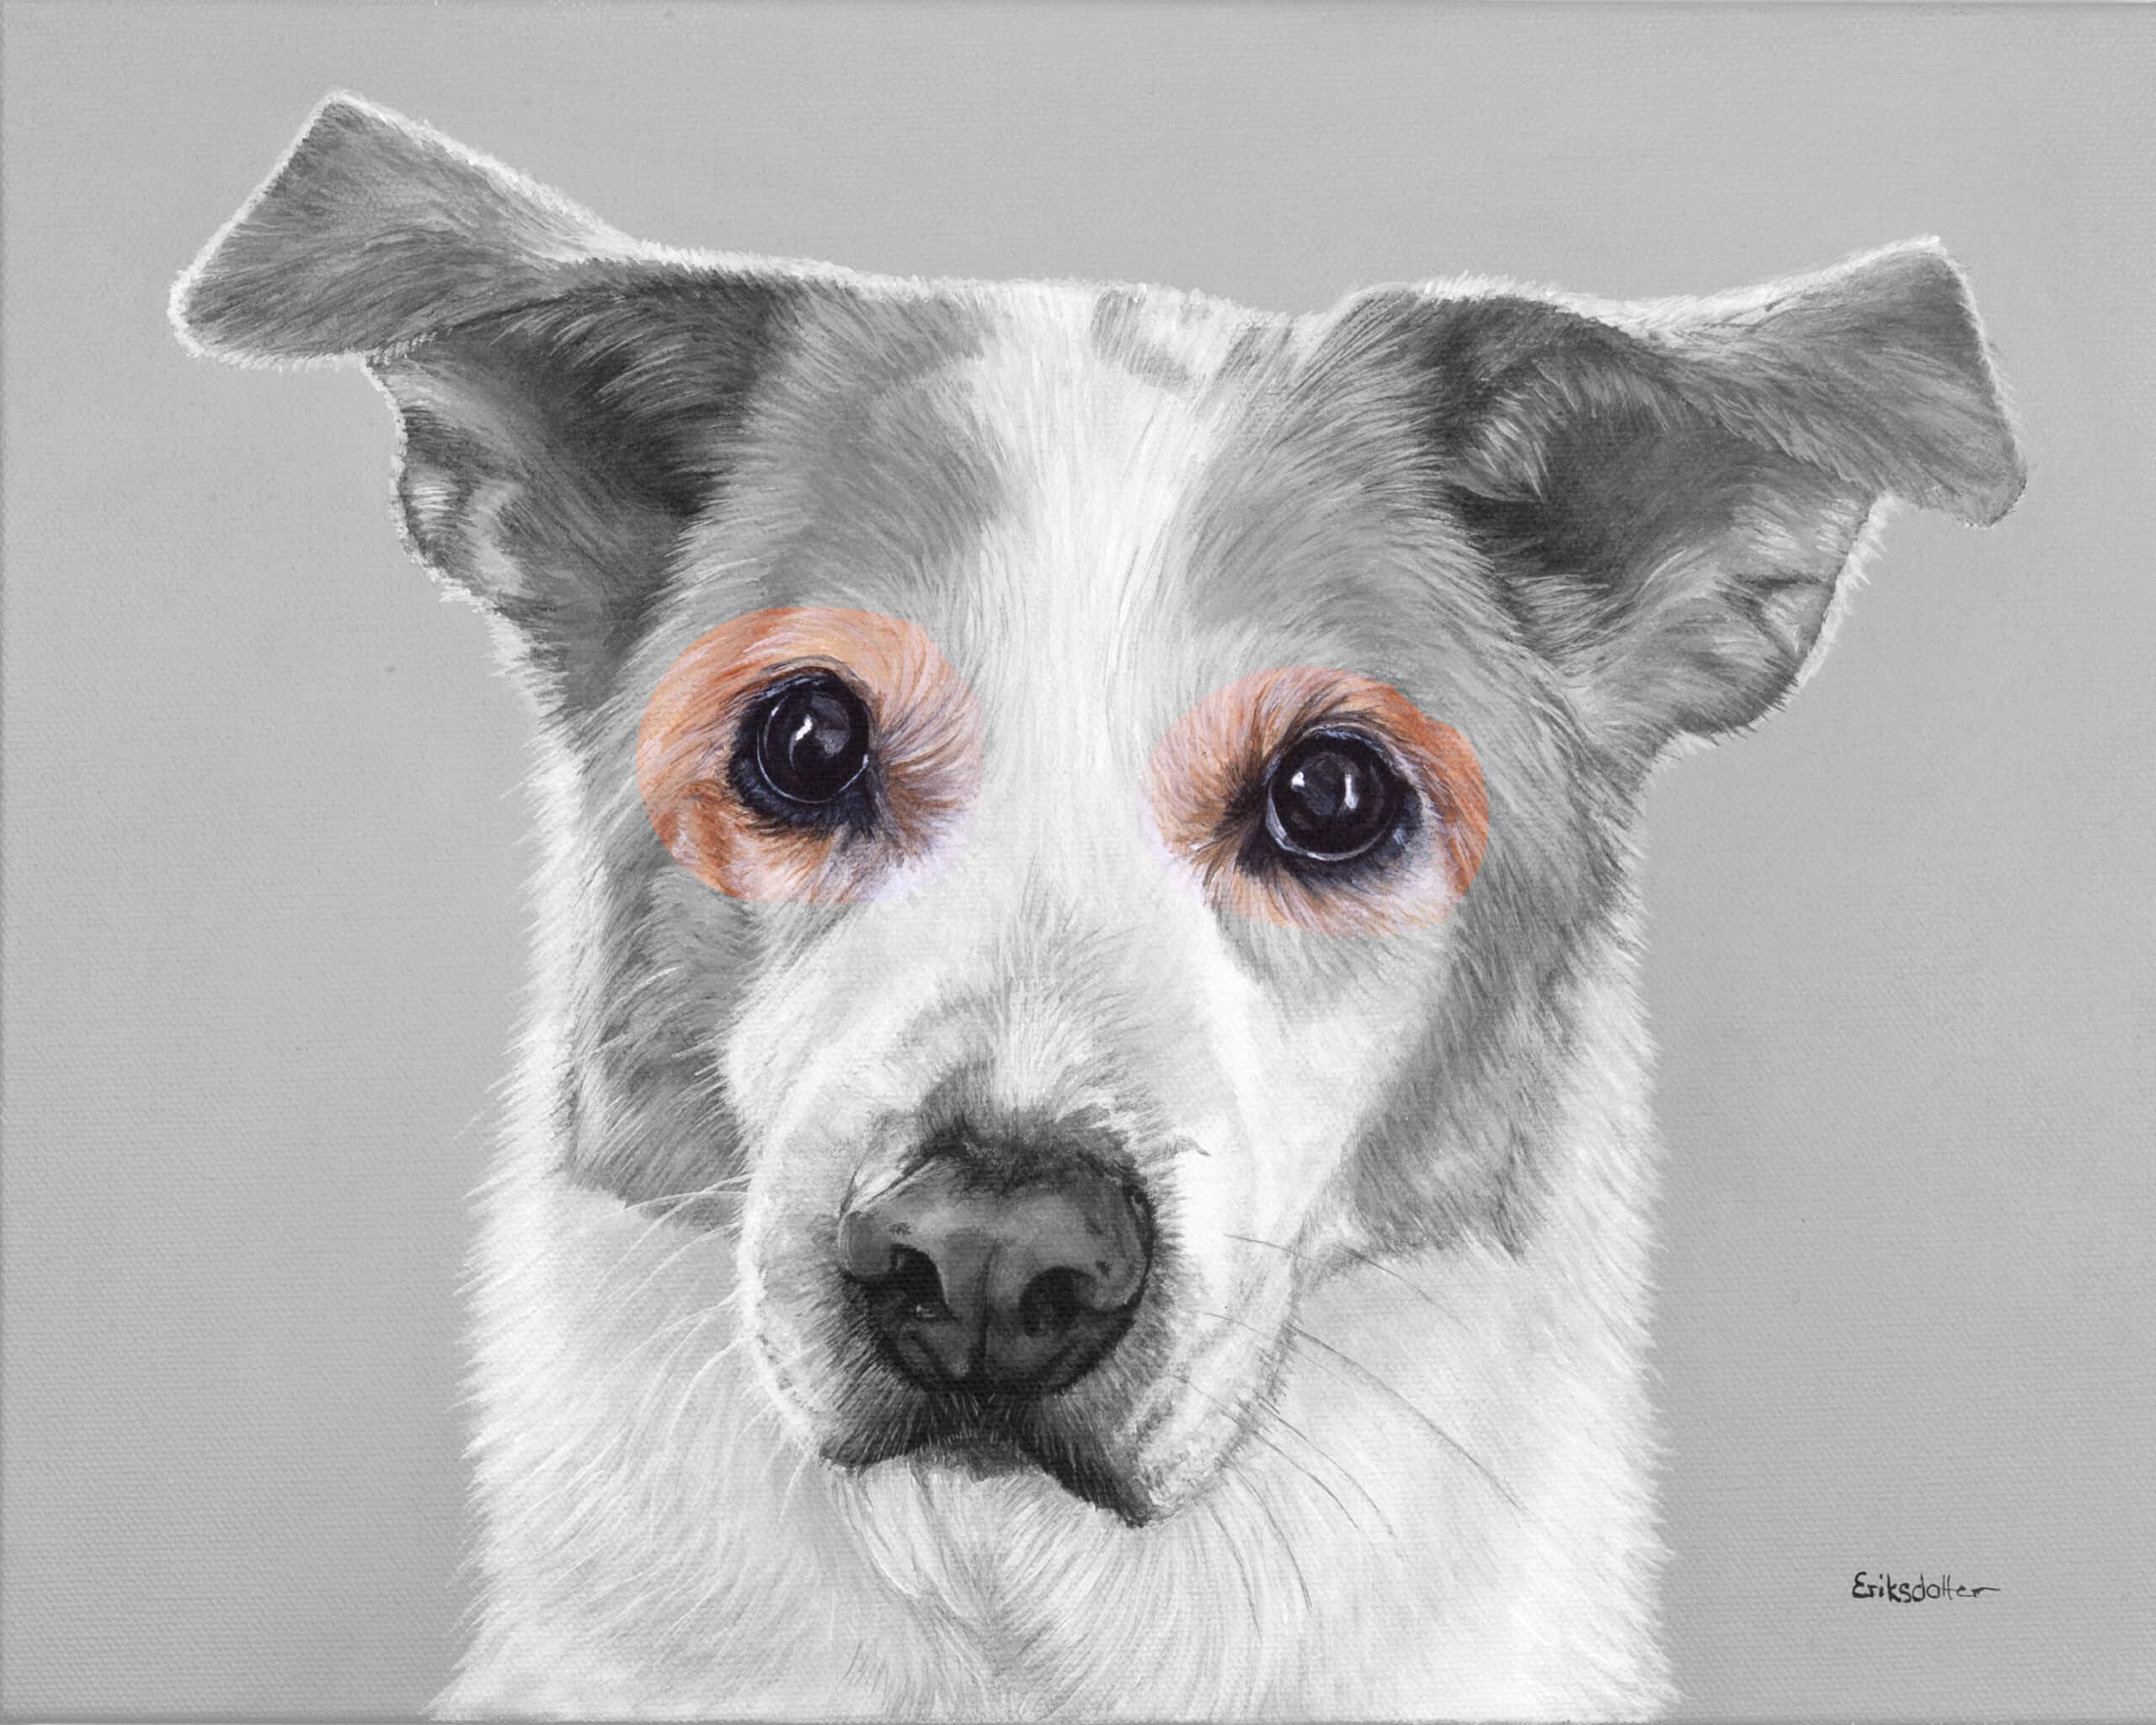
We’re starting with the eyes and we’ll do our best to make Charles’ eyes come alive on our canvas.
The eyes are the window to the soul and they are the first thing the viewer will notice when they first see your painting. The viewer (whether it be a potential customer or the commissioned client) cannot connect with your art work if the portrait of the dog has dead eyes. And without a connection to the animal in the portrait, it’ll be difficult to evoke any sort of beautiful emotions to the subject where the viewer feels like they can reach out and touch the animal.
INSTRUCTIONS:

I’ve highlighted the area in the above photo we’re focusing on. If it’s easier for you to use your downloadable reference photos, please do so! Now let’s move on to some guiding steps. (Psst… if you’re interested in an online course on how to paint soulful eyes with real-time painting, please see here).
To keep it simply, use the following colors: Mars Black, Raw Umber, and Titanium White.
Read all the steps first, then come back to step 1.
1. Start with Charle’s left eyeball (we’ll get to the surrounding areas later).
2. Using a Mars Black, paint the outline of the eyeball (basically a round outline).
3. Then paint the pupil with the same color.
These steps are a good entry point for getting started painting the eyes with ease.
4. Now, fill in the rest of the eyeball with dark brown tones, and using a blend of brown and black closest to the black outline you did earlier.
Your eye should now be completely covered in a layer of paint.
5. Identify the lighter areas in the eyeball in the photo above and apply a blend of Titanium White and Mars Black where you see them. Some areas will be just white while others will be dark gray.
6. Do you see the white line on the bottom of the eyeball? Add that now.
You now have the first layer of the eyeball painted. Depending on the thickness of the paint you used, you may want to add another layer. I paint in very thin layers so my eyes take a few layers before I’m done.
Go ahead and follow the same steps for the right eye before continuing with the below instructions for the surrounding eye.
7. By using a blend of black with a little bit of white, you’re going to paint the surrounding area of the eye that is almost black. You can start with just painting it black and then adding a little bit of gray if you prefer.
8. Do the same step for the surrounding area of the right eye.
9. You can leave the rest of the surrounding area that isn’t black for later.
REVIEW:
Now take a look at the eyes and the surrounding areas. Does it need another layer? A little tweak here and there?
Remember, this is all about progress and not about perfection. If your painting is looking awful right now that’s OK! You’re doing great. All is well and you’re on time.
Look out for tomorrow’s email for your next section.
xo,
Erica