When you want to paint an accurate representation of a beloved dog or cat (or you’re hired to, like I am), it’s helpful to create a road map to anchor into instead of staring at a blank canvas, paintbrush in hand. The outline you sketch on your canvas before you start painting is your roadmap. This becomes your guide for when you paint your first layer. Since the sketch is the starting point, if you’re wondering, “Should you sketch before painting,” the answer is a resounding yes. It’s your anchor and your starting point.
I often feel like the sketch is like solving a math problem or a puzzle, but taking the time to put down the groundwork will allow you to more easily let the art flow you through when you finally pick up the brush.
How detailed should your sketch be?
You have the option of how much you want to sketch before you start painting. You can simply do a basic outline of your pet so you know where on the canvas you’ll be painting the portrait and loosely where the main features go. Or you can do a more detailed sketch.
A more detailed sketch includes:
- Outline of the pet, eyes, and nose that shows where the darker and lighter tones go
- Mouth that may already have a few strands of hair caught inside of it.
- Show clues of any color changes in the fur and in what direction the strands of hair fall.
My sketch varies in detail depending on how much detail is shown in the reference photos I’m using for a commission. I know how valuable the sketching phase is and I often spend several hours putting down this roadmap for myself over a few sessions. Sketching out a new commission is intellectually exhausting so I limit the time I spend each session, particularly if it’s a larger commission.

Want to learn more in-depth information on how to paint your pet portrait? Check out my course How to Paint Soulful Eyes.
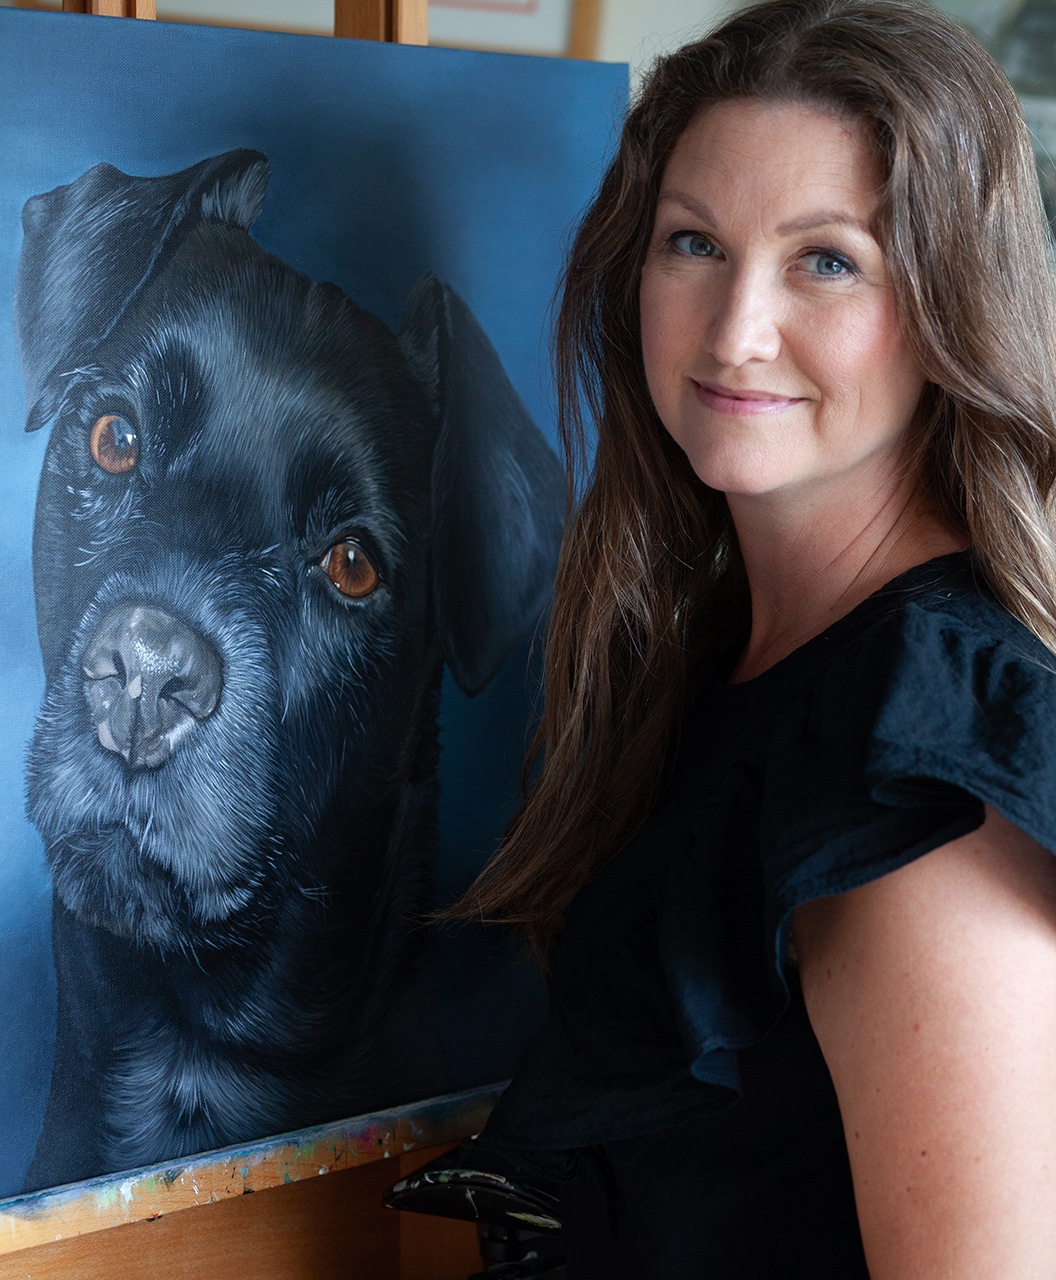
When I’m painting custom portraits, I need to capture the essence, character, and the soul of the pet. Starting with a sketch allows me to not only get the accurate propositions that will serve as the foundation for our pet portrait but also capture the unique details the owner loved so much.
I do the outline and focus on getting the main features (eyes, nose and mouth) down with more precision–often with millimeter accuracy–to create not only a realistic pet portrait, but a realistic portrait of the specific dog or cat I’m commissioned to paint.
For me, spending time studying the portrait while sketching introduces me to the animal and the many layers the painting will need. It allows me to take in the full project while focusing on my step-by-step approach.
Related: Click here for a step-by-step blog series for how to paint a pet portrait, layer by layer.
When I apply the first layer of acrylic paint, I follow this sketch–my roadmap –which then creates the foundation for the portrait. I know my pet is already on the canvas, now I need to allow him or her to reveal himself onto the canvas in color. Knowing I have a roadmap to follow, I can step inwards and tap into the animal I’m painting. Even with a rudimentary sketch on the canvas, my brush can more easily find its way transferring the likeness from the reference photos and the portrait, adding nuances of the hue and the tones more easily. The sketch allows me to step out of my mind to be in alignment and allow me to get into the flow of the creative process.
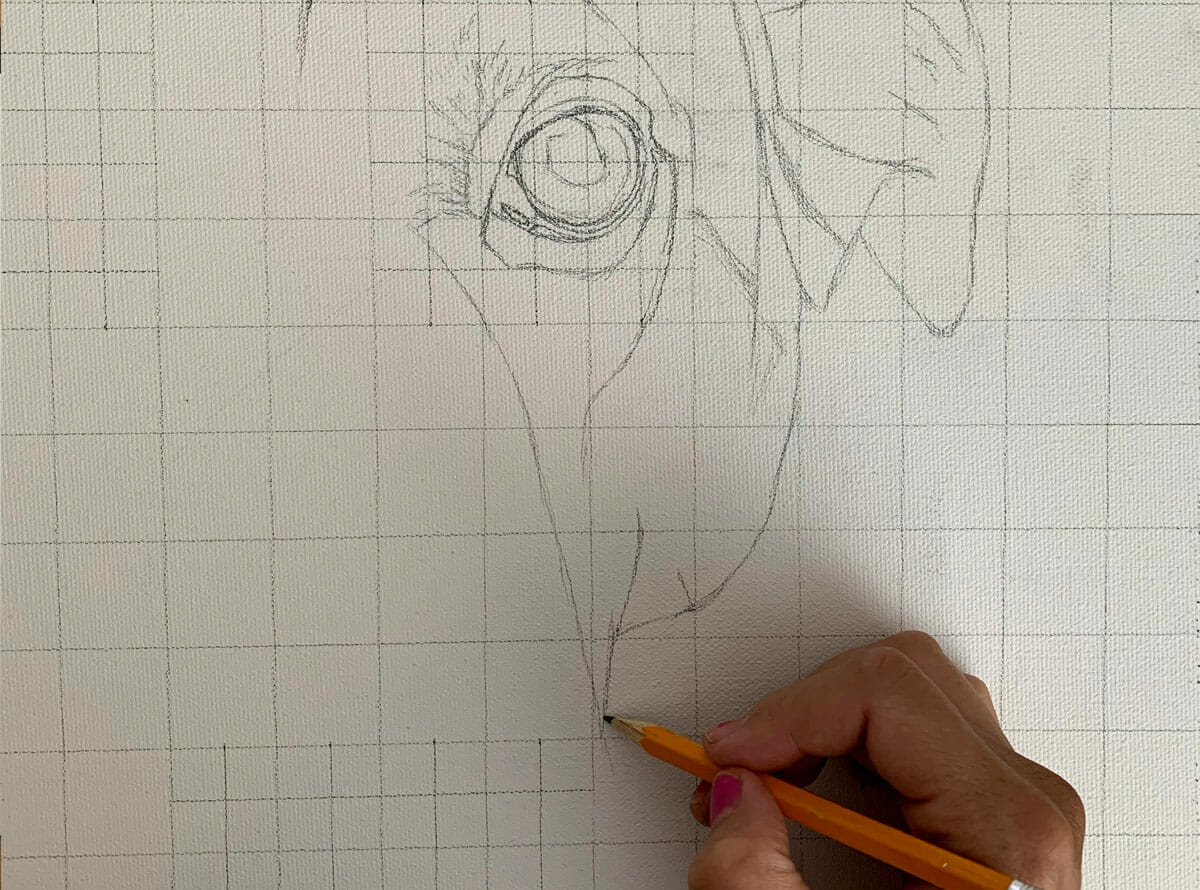
How to create a pet portrait sketch
There are various different ways to create a sketch. I prefer using a grid. Using a grid is a traditional and common way to transfer a scene or a photo onto a canvas. It’s been used by masters like Da Vinci to art students around the world. If you’re struggling with your sketch, my course How to Paint a Dog Portrait teaches all that and much more.
- Step 1: Before you create your grid. You want to decide if you’re sketching to scale or enlarge the photo. For example, if your reference photo is sized 8×10 you’re enlarging the image by transferring the image to a canvas that is larger than a 8×10.
- Step 2: Draw a grid on the reference photo. You can print out your photo and draw a grid directly onto the photo with a pencil, ruler and eraser. Check out this handy supplies list for my favorites. Or you can make a grid in computer software like I do. I use a simple 1 x 1 inch format grid and then I label each column and row so I can quickly find the square I’m working on.
- Step 3: Create a grid on the canvas. If you’re following the same size, this is an 1×1 inch grid, the same as your photo. If it’s a larger sized canvas, 16×20 inch for example, you’d make the grid on your canvas a 2×2 inch size. Then you label the columns and the rows the same as on the reference photo.
- Step 4: Time to transfer the image square by square starting with the outline and then the main features. I break down this step into several smaller manageable steps in the first module of my How to Paint a Dog Portrait online course because it can get a bit overwhelming if you’re doing a memorial portrait for example.
There’s a lot riding on your sketch if this painting is in honor of a beloved pet since it’s the foundation of the finished painting. In the online course, I also share what to do if you don’t have a great reference photo of a pet and need to work off of several images to get a great portrait.
There you have it! A quick overview of my first step in my proven process of painting pet portraits and why you should sketch before painting.
xo,


Some bonds never really leave us.
They simply find new ways to stay close.
Begin Your Portrait Conversation
If you feel drawn to honor your beloved companion in this way, you’re invited to learn more about commissioned heirloom portraits.